
Paint accumulates along the rim of the can. As you dip the brush and wipe it against the edge, streaks run into the narrow groove where the lid must fit. Once the job is complete, dried paint around the opening turns closing the container into an additional cleanup chore.
The issue begins at the wiping point. Some DIYers place a standard rubber band across the top of an open paint can before they start, utilizing a household item that costs nearly nothing.
The band serves a purpose beyond simple organization, helping to prevent one of the messiest aspects of painting.
Why Put a Rubber Band Around a Paint Can?
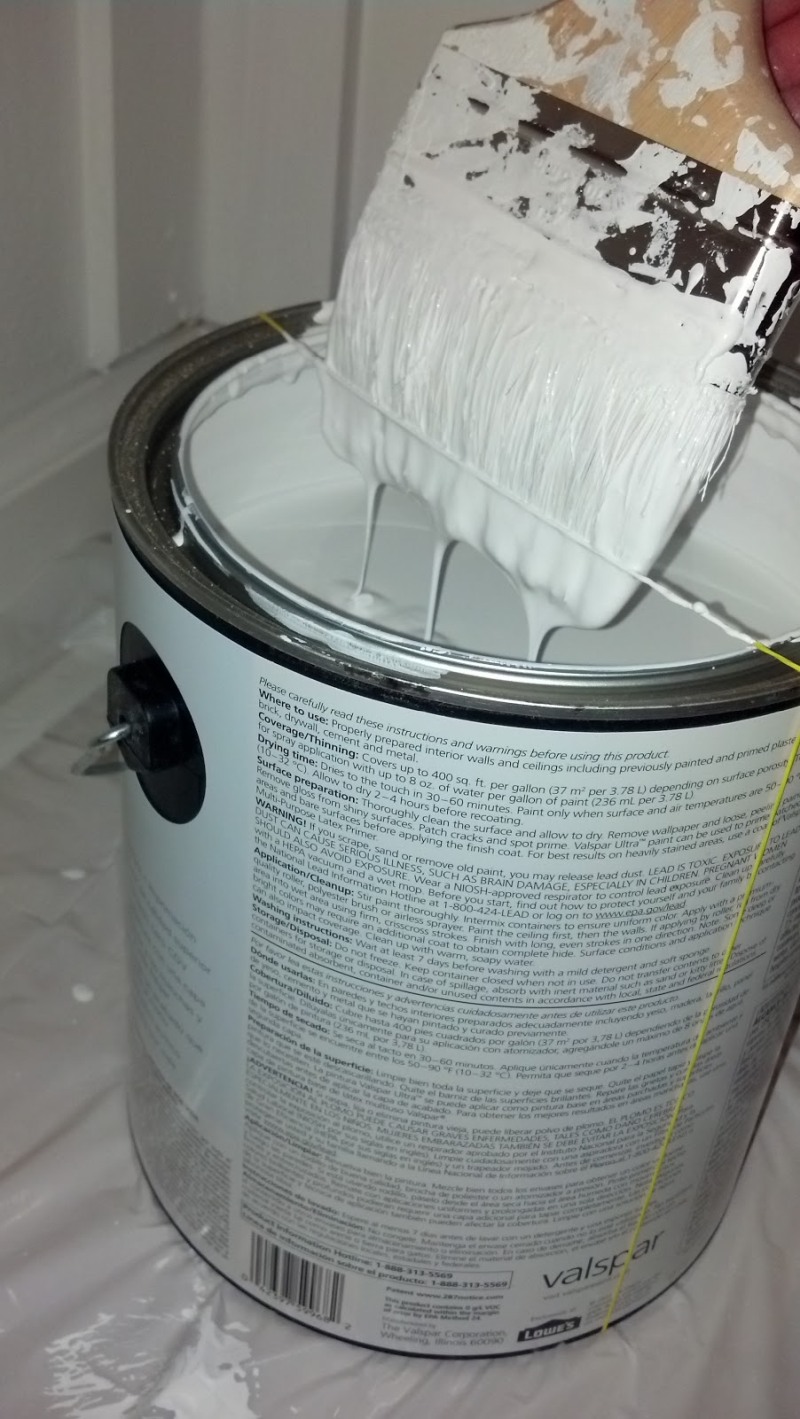
The rubber band forms a wiping edge across the container's opening. Rather than dragging the brush against the metal rim, the painter pulls it across the band to remove excess paint.
Paint drips back into the can instead of collecting in the groove around the lid. Keeping this groove clear facilitates resealing the container and stops dried paint from building up along the opening.
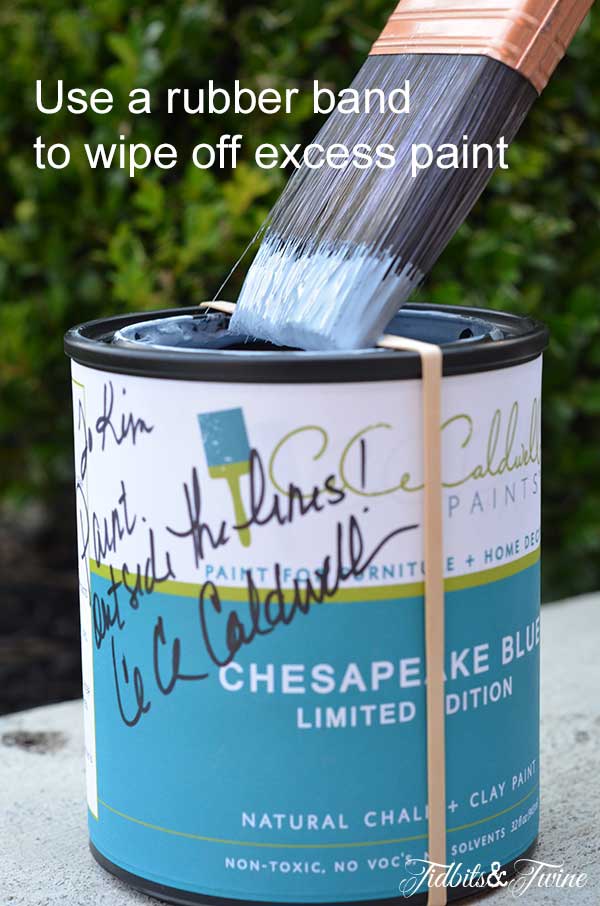
A demonstration from Tidbits & Twine illustrates the method using a can of "CeCe Caldwell Chesapeake Blue" chalk paint. The rubber band spans the opening while a loaded brush rests against it, allowing excess paint to flow back into the container.
How to Use the Rubber Band Trick
Select a wide rubber band that fits around the paint can without being stretched to its limit. Loop it over the container so that one section crosses the opening from side to side.
Dip the brush into the paint, then draw the bristles against the band before applying it to the surface. Excess paint falls back into the container, leaving the brush with a more manageable amount.
This setup works for small painting projects involving doors, trim, furniture, or walls. No separate brush-wiping attachment is required.
What to Know Before Trying It
A rubber band under excessive tension can snap, splattering paint onto nearby surfaces. Use a sturdy band that fits the can, and avoid pulling the brush against it with too much force.
Removing the band can also cause drips. Keep a cloth near the container, lift the band from one side, and release it carefully. For larger projects, pouring paint into a separate working container can keep the original can free from residue.
Another painting trick uses a kitchen staple instead of a rubber band. See why some DIYers recommend putting aluminum foil under paint before starting a DIY project and how it reduces cleanup afterward.
One rubber band provides a place for the brush to shed excess paint without leaving it along the can’s rim. It is a clever use for an item most people keep in a drawer.
Do you know any other painting tricks that use ordinary household items?
The post Putting a Rubber Band Around an Open Paint Can: What It’s For and Why DIYers Recommend It appeared first on Homedit.























































Ah, the classic rubber band. Because nothing says “professional finish” like a stretched band snapping off during the crucial moment. I’m sure the paint gods will reward my meticulous wiping technique.
Haha, well spotted! The snap is part of the charm. But honestly, those bands keep the lid sealed tight, preventing that dreaded skinning issue. It’s a small, simple trick that saves hours of cleanup and keeps your paint fresh for next time. Worth the occasional snap!