
Anna Price brought home a yellow pie safe from an antique shop with a finish that needed attention. She estimates the cabinet dates from the 1950s. The door frames were greasy and she disliked the hook-and-eye fastener, but the cabinet itself was intact. She changed its colors and hardware without rebuilding it.
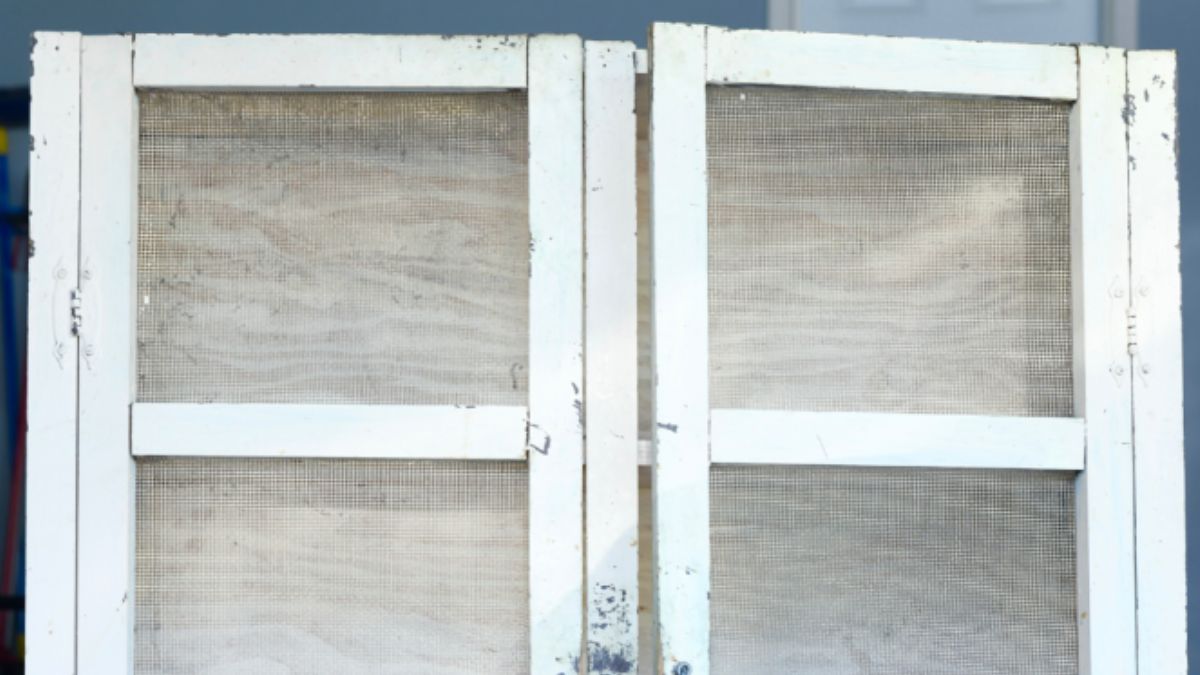
Ironstone inside, Aviary outside
Price chose two colors from Miss Mustard Seed’s Milk Paint. Ironstone went inside the cabinet to brighten the shelves, while Aviary covered the exterior. Milk paint arrives in powder form, so she mixed it with water before applying it. Cleaning and dulling the old finish took time, particularly around the door frames where fingerprints had built up.
How Price refinished the pie safe
Price estimated the job took about eight hours. Here is the sequence she described, including the preparation that made the finish possible.
- She scrubbed the cabinet, including its underside, with hot water and all-purpose cleaner, then set it in the sun for an hour. Once the wood had dried, she removed the clasps and the mesh inserts from the doors. She washed the mesh separately in the bathtub.
- Wearing a mask, she used a random orbital sander and 150-grit paper on the cabinet, shelves, plywood back and underside. She sanded the inaccessible spots by hand and wiped away the dust with a damp cloth.
- She painted the interior with Ironstone first and shielded it with craft paper and tape before doing the exterior. She applied two coats of Aviary, letting the paint dry before moving on.
- After a light pass with 220-grit paper and another damp wipe, she sealed the finish with Milk Coat. She stapled the mesh back in place and ordered replacement clasps.
In Price’s account, the Ironstone interior made the cabinet look “so much brighter and cleaner.” She noted that a light color inside a cabinet can take more than one coat. Homedit also points to a larger glass-front oak hutch as another example of the approach: mint with a little aqua outside, pale antique mocha on the interior shelves.
Price suggested quilts as one possible use for the cabinet. Her husband saw room for his Lego cars, lighthouses and spacecraft. The fresh paint gave a sound piece of furniture a place in their home again.
Check old paint before sanding
The age of this cabinet is Price’s estimate, and the original account does not say whether the old finish contained lead. If you are refinishing similar vintage furniture, find out whether the paint contains lead before disturbing it. Leave a suspect or lead-positive coating undisturbed and consult a qualified lead professional before sanding.
Sources: Homedit’s account of the pie safe, Anna Price’s project notes and EPA guidance on reducing lead exposure.





























I love how she avoided a full rebuild. Did the milk paint penetrate the old finish well, or did you have to sand it down completely? I’m curious about the adhesion on those greasy door frames specifically.
Great question! For the greasy frames, I used TSP to degrease them before applying the paint. I didn’t sand down to bare wood, just enough to break the gloss. The milk paint adhered beautifully, creating that authentic, rustic look without a complete strip-down. Thanks for reading!