
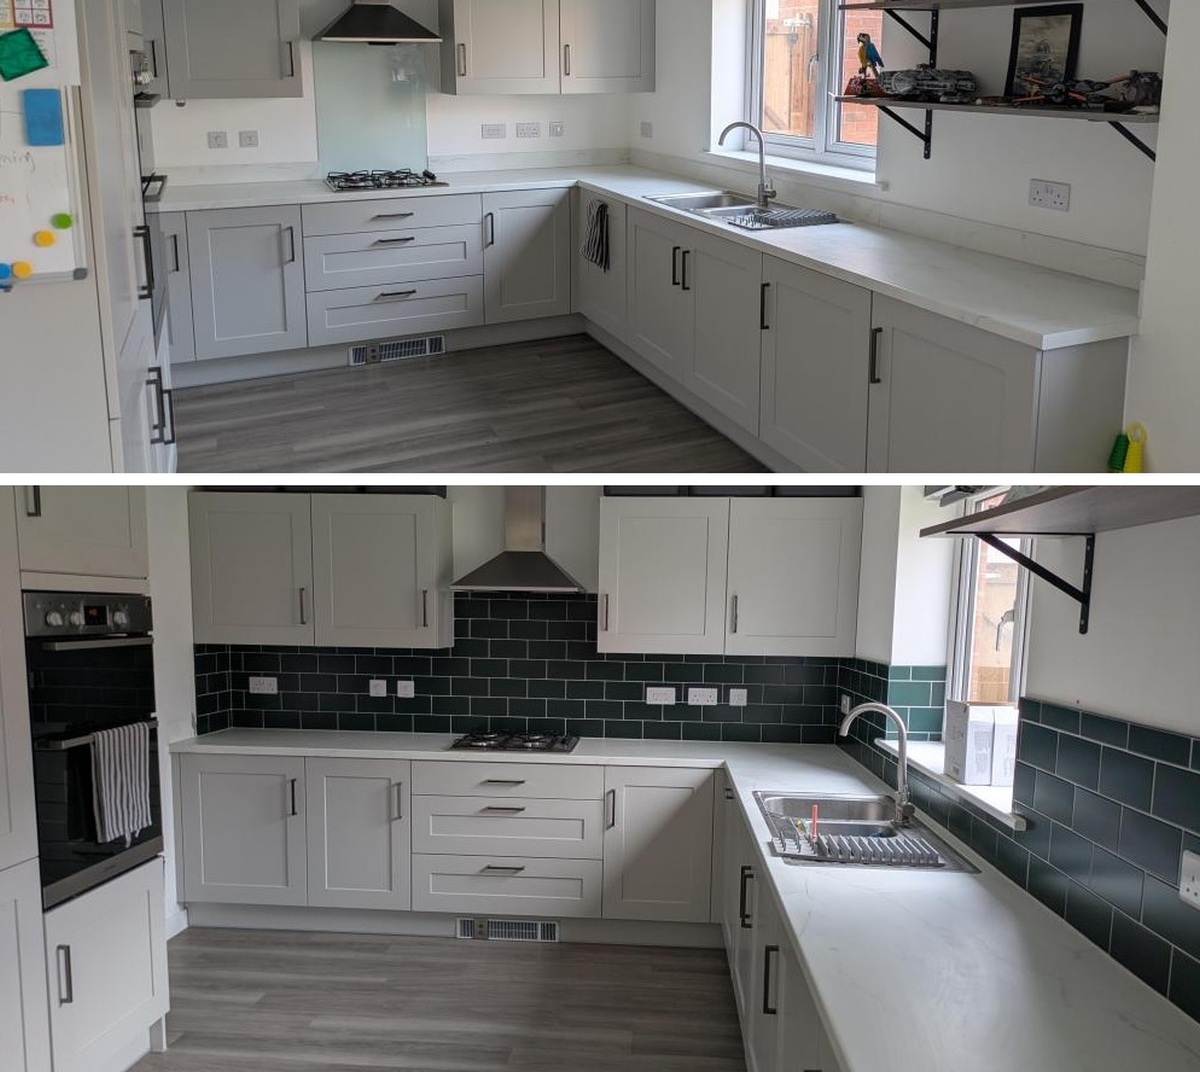
The kitchen featured gray cabinets, white countertops, and bare white walls, giving it a completed appearance despite the absence of a backsplash. A pale glass panel shielded the wall behind the gas hob, and short countertop upstands lined the area beneath the cabinets. The cooking zone and the sink wall were linked only by these white surfaces.
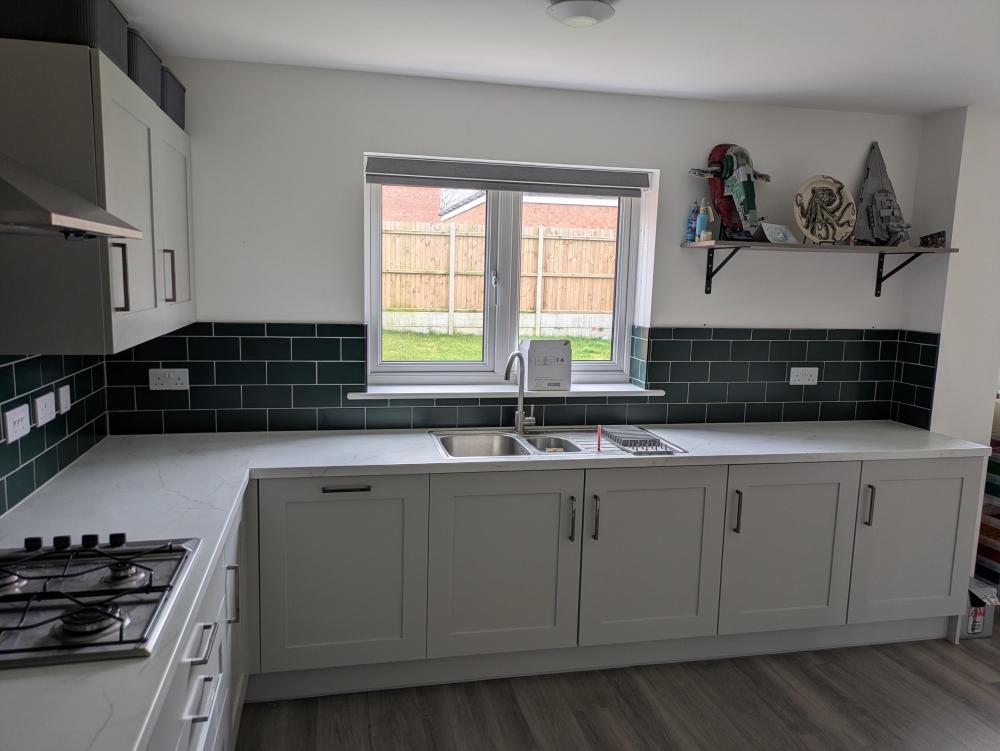
Seeking additional color without repainting the cabinets or swapping the countertops, the homeowner opted for forest-green rectangular tiles. These tiles were applied to the walls behind both the gas hob and the sink, extending into the narrow spaces surrounding the window.
User u/CakieStephie posted on Reddit’s r/kitchenremodel, sharing four images that contrasted the kitchen’s appearance before and after the tiling. The layout, appliances, and cabinets remained exactly as they were.
Before: Gray Cabinets Against White Walls
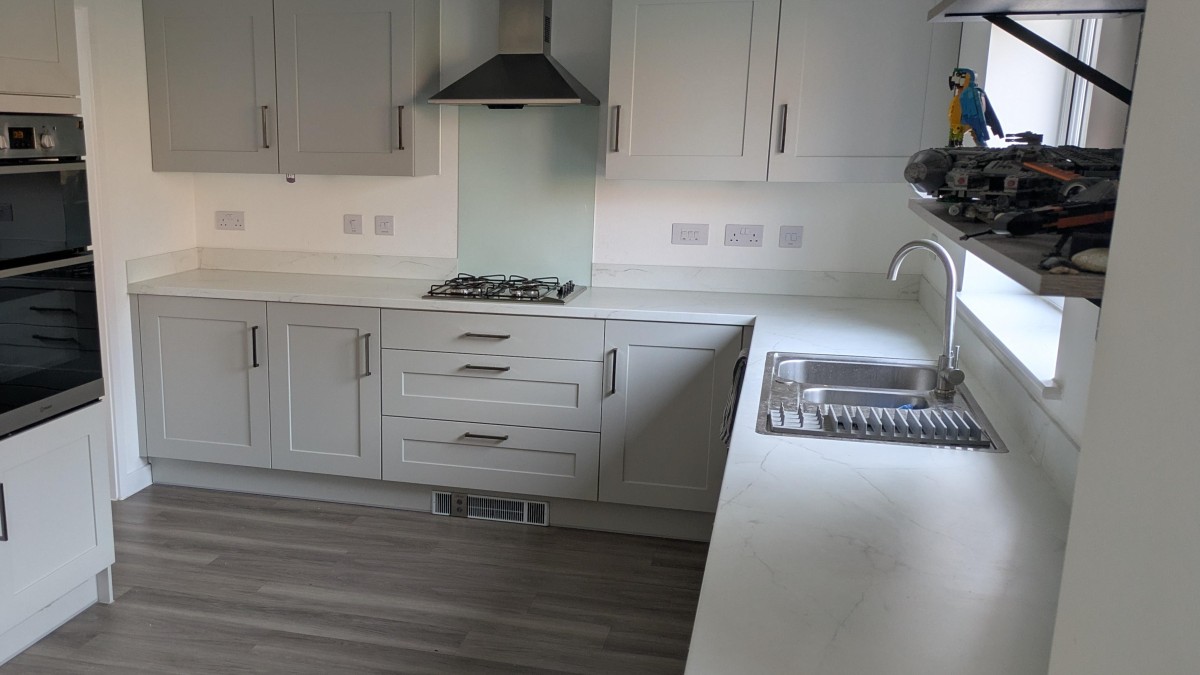
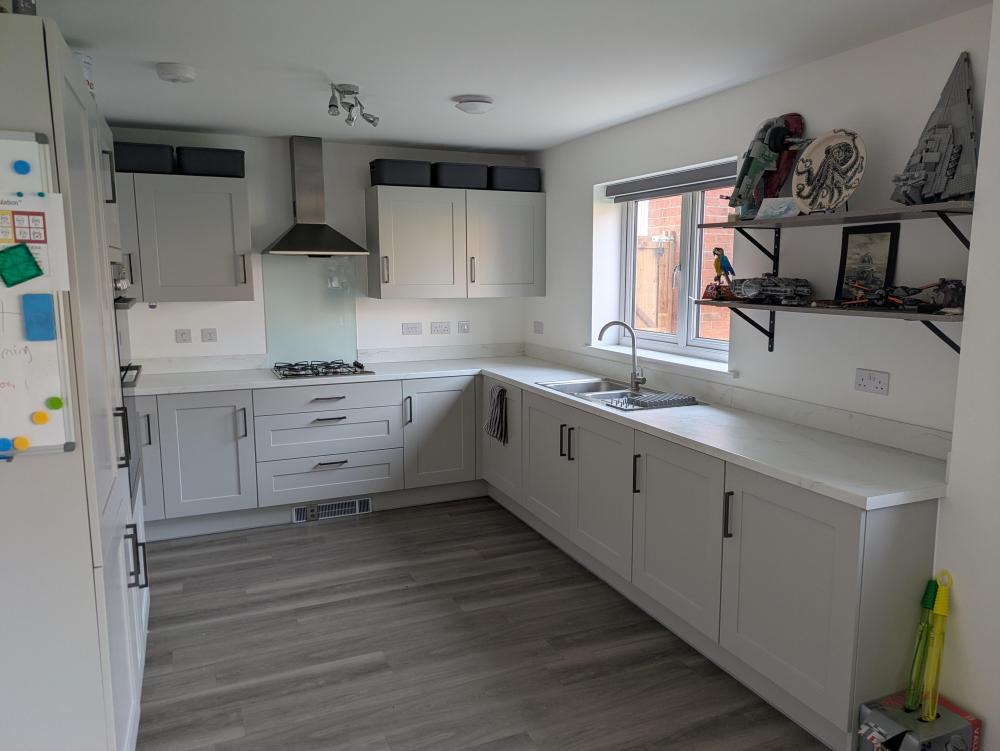
Pale gray shaker-style cabinets encircle the kitchen. A built-in oven is situated within tall cabinetry on the left, while a stainless steel chimney hood is positioned centrally above the gas hob. The countertops are white with subtle gray veining, and the flooring consists of gray wood-look planks.
The wall dedicated to cooking lacks a conventional tile backsplash. A glass panel is installed between the hob and the extractor hood, with white painted walls visible beneath the upper cabinets. Short white upstands on the countertop protect the lower sections of the walls.
Black storage boxes occupy part of the space between the top of the cabinets and the ceiling. Open wooden shelves near the window display LEGO models, offering one of the few colorful accents in the room.
The Existing Layout Stayed in Place
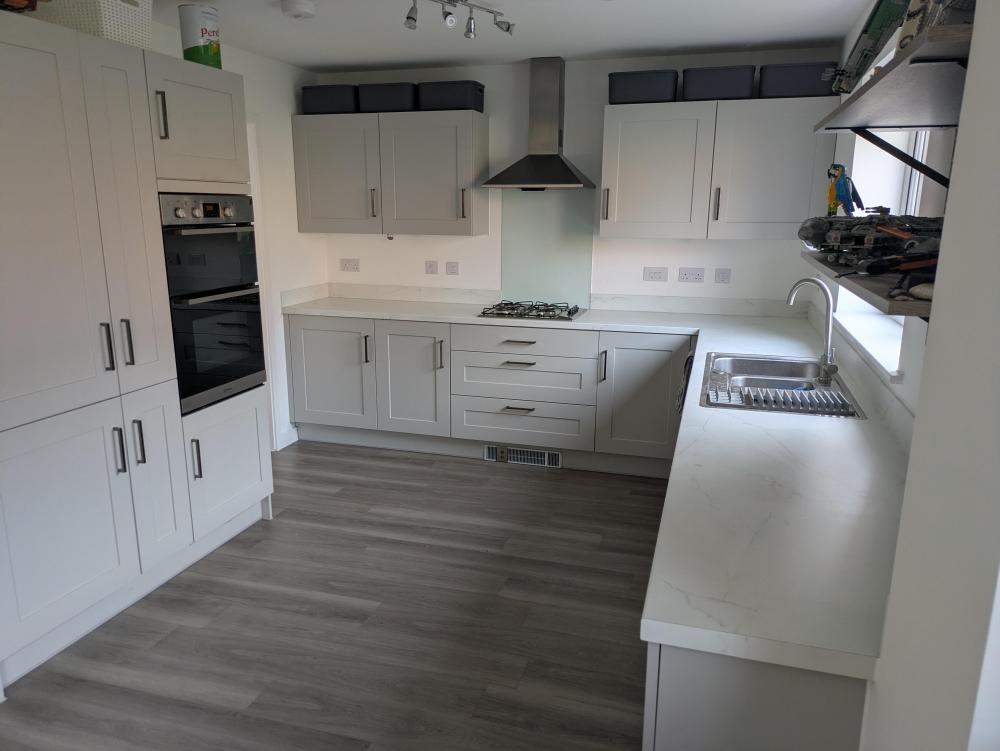
Viewed from a different angle, the tall cabinet unit houses the oven and extra storage, while three wide drawers are located under the gas hob. The cabinet doors feature recessed panels and straight metal handles, maintaining the same gray finish along the sink wall.
A stainless steel sink is positioned under a double window, with countertop space available on either side. A long expanse of white counter extends toward the right side of the kitchen, situated below the open display shelves.
The renovation did not require relocating the sink, replacing cabinet doors, or installing a new worktop. The primary focus was on the exposed wall areas above the counters.
Forest Green Tiles Cover the Entire Cooking Wall
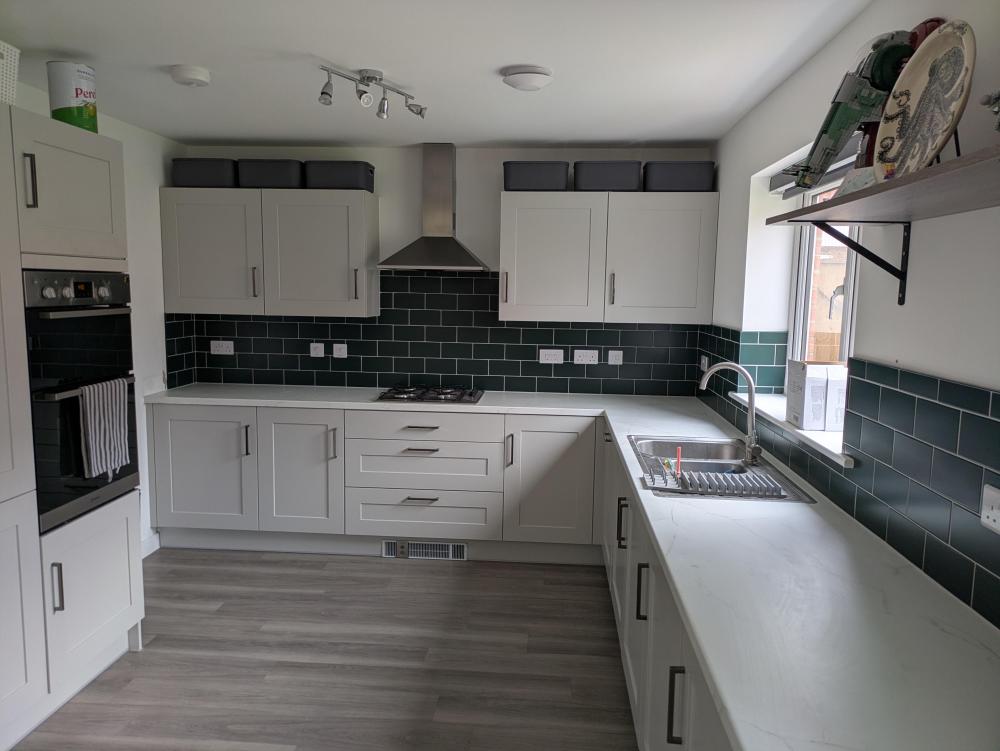
The homeowner chose Topps Tiles Matrix Wilderness Green Matt, which are rectangular ceramic tiles measuring 9.8 by 19.8 centimeters.
Laid in a staggered brick pattern, the tiles span from the countertop to the bottom of the wall cabinets. White grout defines each dark green rectangle, and the stainless steel extractor hood remains installed above the gas hob.
The original glass splash panel is gone, replaced by the same green tiling used on the rest of the wall. The tiling extends into the left corner and along the counter toward the sink, covering areas that previously featured white paint and short upstands.
A tradesperson handled the installation, as confirmed by the homeowner. When asked about removing the original countertop backsplash, she noted that it seemed to be glued directly to the wall.
The Tiles Continue Around the Window and Sink
The green tile runs along the sink wall, framing the lower sides of the window recess and continuing beneath the open wooden shelf on the right. The upper wall remains white, with the backsplash terminating at a uniform height past the window.
On the cooking wall, the upper cabinets mark the upper limit of the tiling. Along the window wall, this boundary is visible even without cabinets above, forming a green band that stretches across the countertop.
The gray base cabinets, stainless steel sink, curved faucet, and white countertop remain unchanged. With the original short upstands removed, the green tiles now meet the counter surface directly.
She Chose Forest Green Instead of a Safer White Backsplash
White subway tiles with dark grout would have been a standard choice, complementing the countertops while adding visual interest. The homeowner opted for a different path, selecting dark green tiles paired with white grout instead of another light surface.
A Reddit commenter proposed extending the tiles to the ceiling and around the entire window, but the homeowner kept the tiling at backsplash height, leaving the upper wall white. This raises a design question: would a full-height green wall have been overwhelming for a kitchen with gray cabinets?
The homeowner expressed satisfaction with the outcome, describing the matte green finish as evoking the feeling of a forest. Another commenter appreciated her decision to avoid white tile.
Would you have selected forest green, or would classic white subway tiles with contrasting grout have been the superior choice?
Image credits go to u/CakieStephie
The post She Didn’t Touch Her Gray Kitchen Cabinets, but Forest Green Tiles Changed the Entire Room appeared first on Homedit.











Love this update! The forest green tiles add such a vibrant, fresh touch to the gray cabinets. It’s a brilliant way to inject color without a full renovation. Great find!
Thank you so much! I’m thrilled you love the forest green tiles. It really is a wonderful way to add vibrancy without the hassle of a full renovation. Enjoy your updated kitchen!