
Although her spouse had never hung picture frame molding, she possessed a clear vision for their bedroom walls. The project evolved from simple black rectangles sketched on a room photo into a complex DIY task. It demanded exact measurements, precise angled cuts, and the use of numerous trim pieces.
Instagram creator @halcyonhaus_, who goes by Halcyon Haus, documented this transformation. The Colorado homeowner designed the layout, while her husband managed the physical installation. They adapted to existing windows, electrical outlets, and a vaulted ceiling rather than altering the room’s fundamental structure.
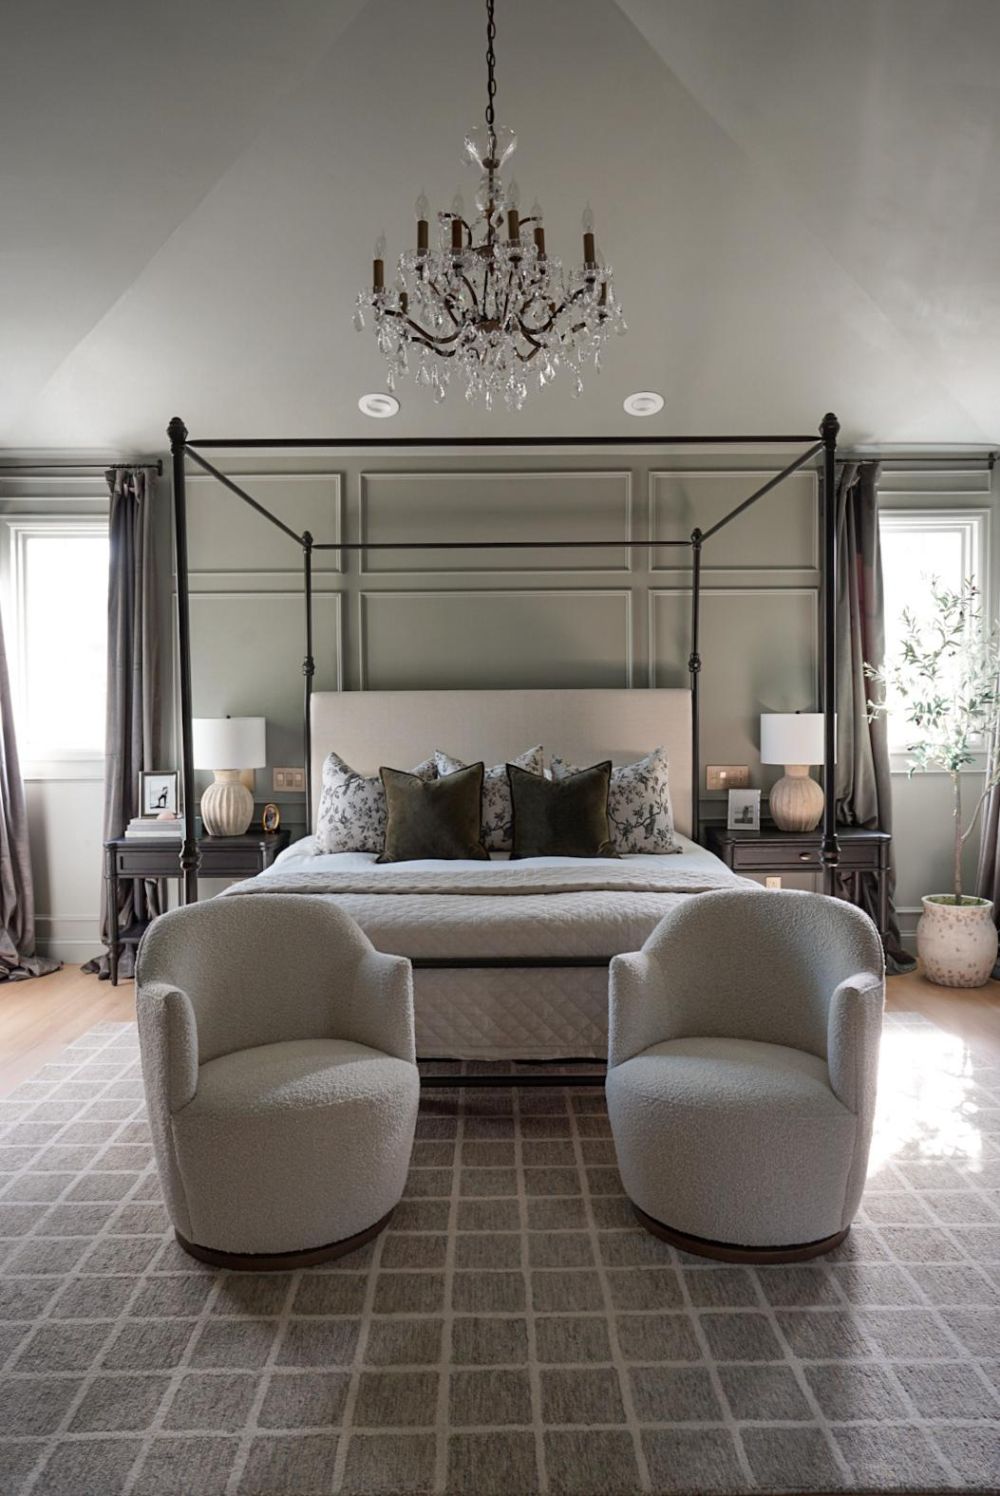
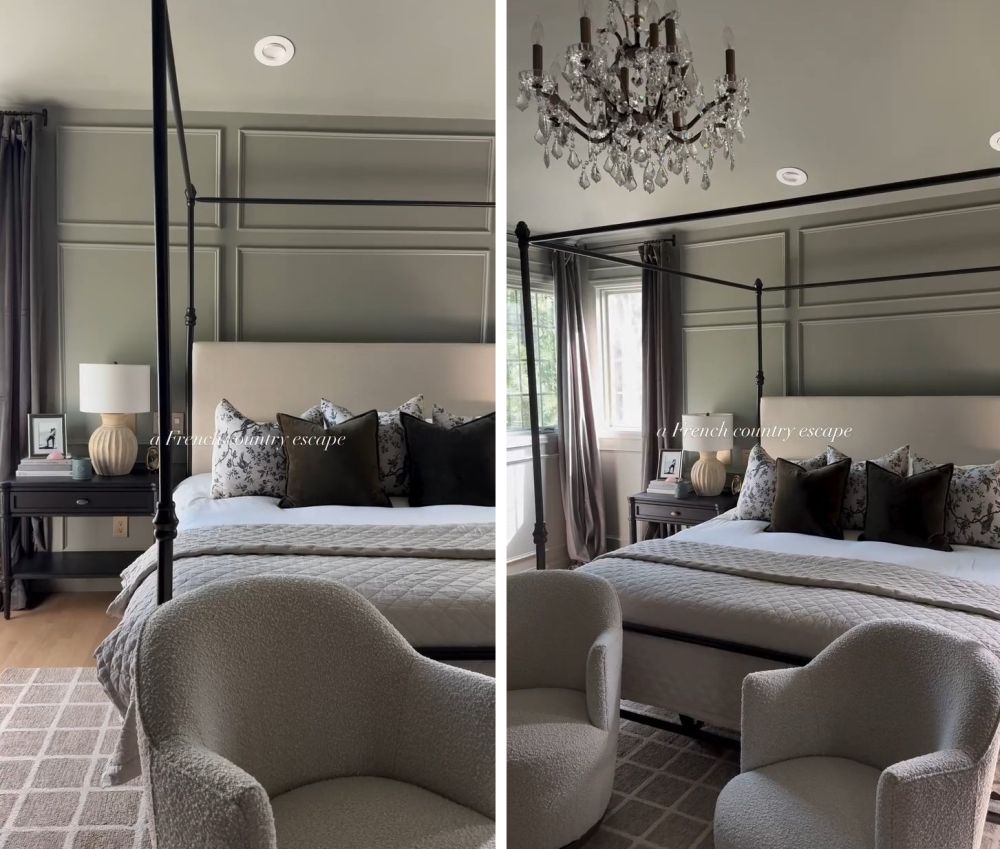
The finished space evokes a European chateau aesthetic. Paneled walls painted in Farrow & Ball Pigeon complement a four-poster bed and a crystal chandelier. Construction photos reveal the journey from an empty room to the final design, highlighting the choices that ensured a successful first-time installation.
She Planned the Molding Layout Before Her Husband Started Cutting
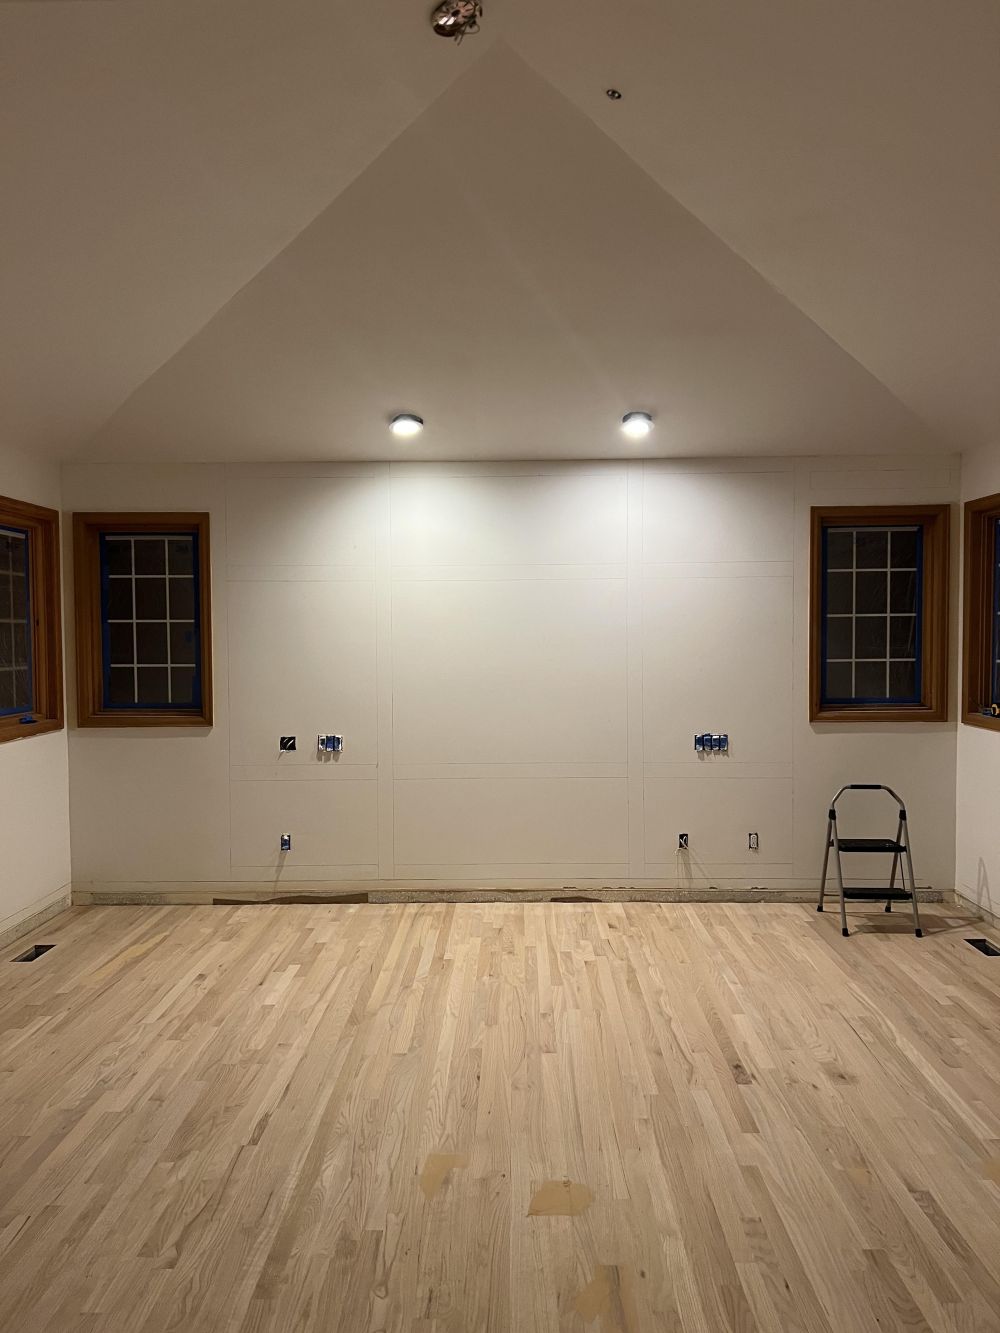
The room originally featured plain walls under a vaulted ceiling, wood flooring, and windows near the corners. Without existing decorative panels, the homeowners had to determine how the new molding would integrate with these fixed features.
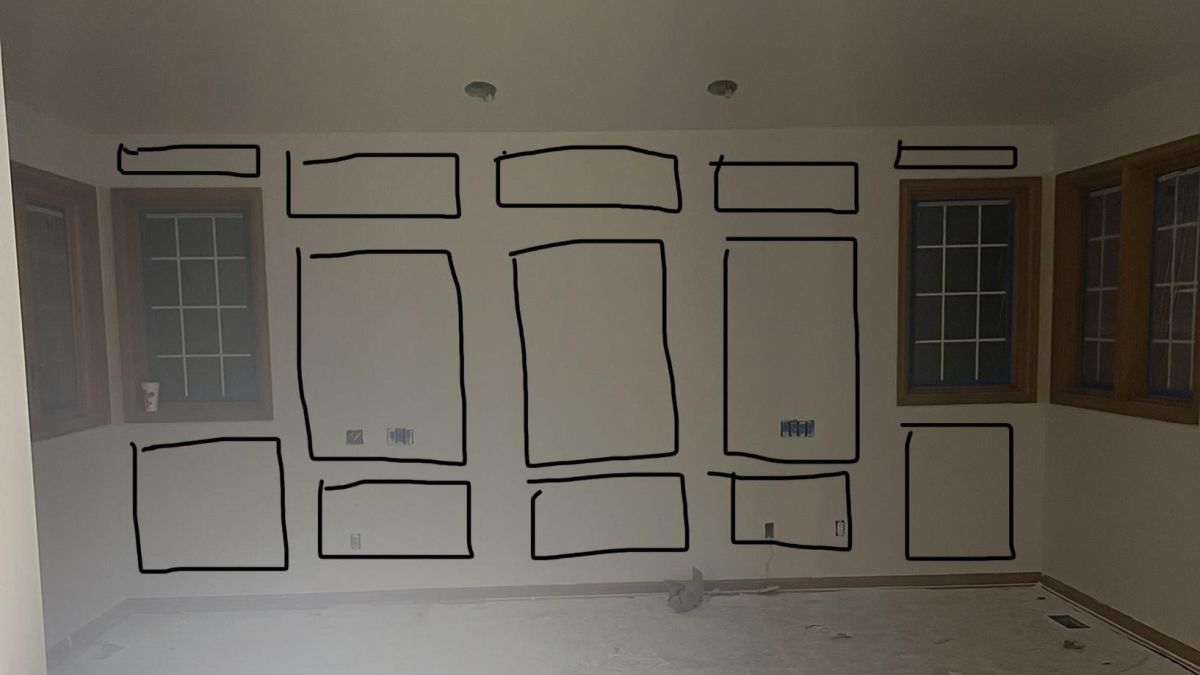
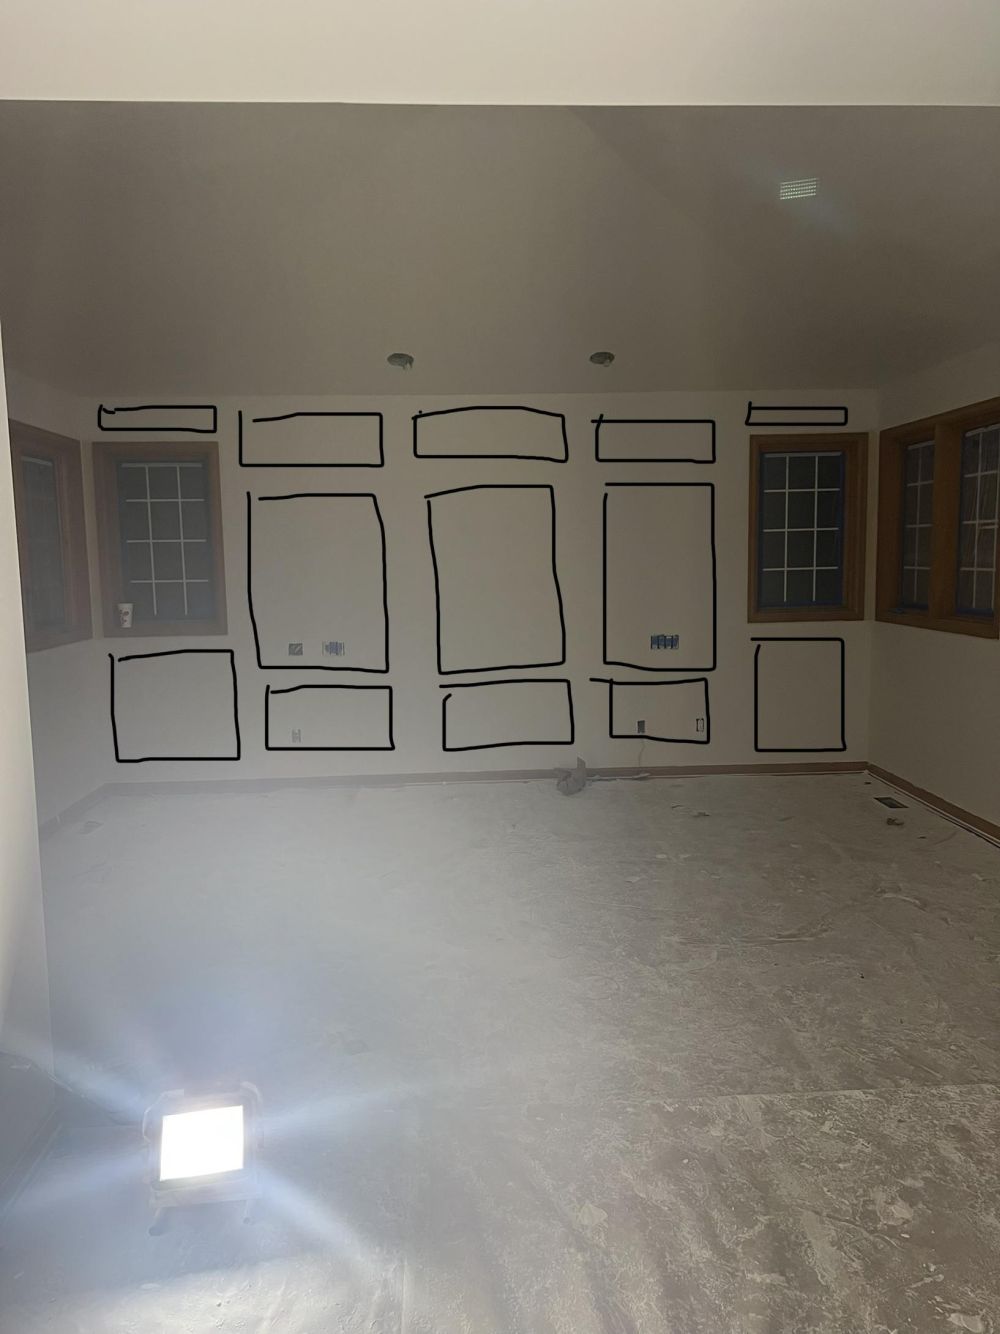
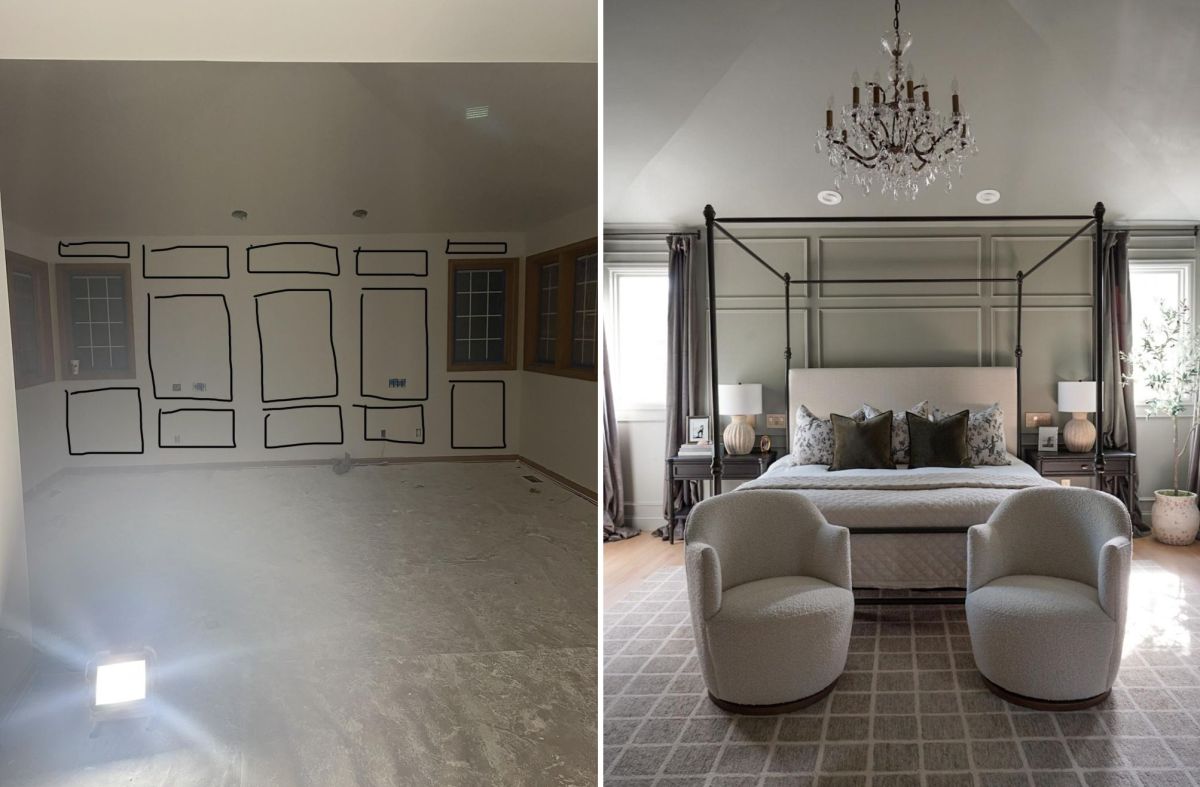
The homeowner mapped rectangles onto a photo of the main wall. She placed larger vertical boxes in the center, with smaller sections above and below. Narrow panels filled the spaces above the windows, while additional rectangles occupied the lower corners.
This layout required varied panel sizes instead of a repeating grid. The central arrangement was positioned specifically where the bed would stand.
Her Husband Installed Picture Frame Molding for the First Time
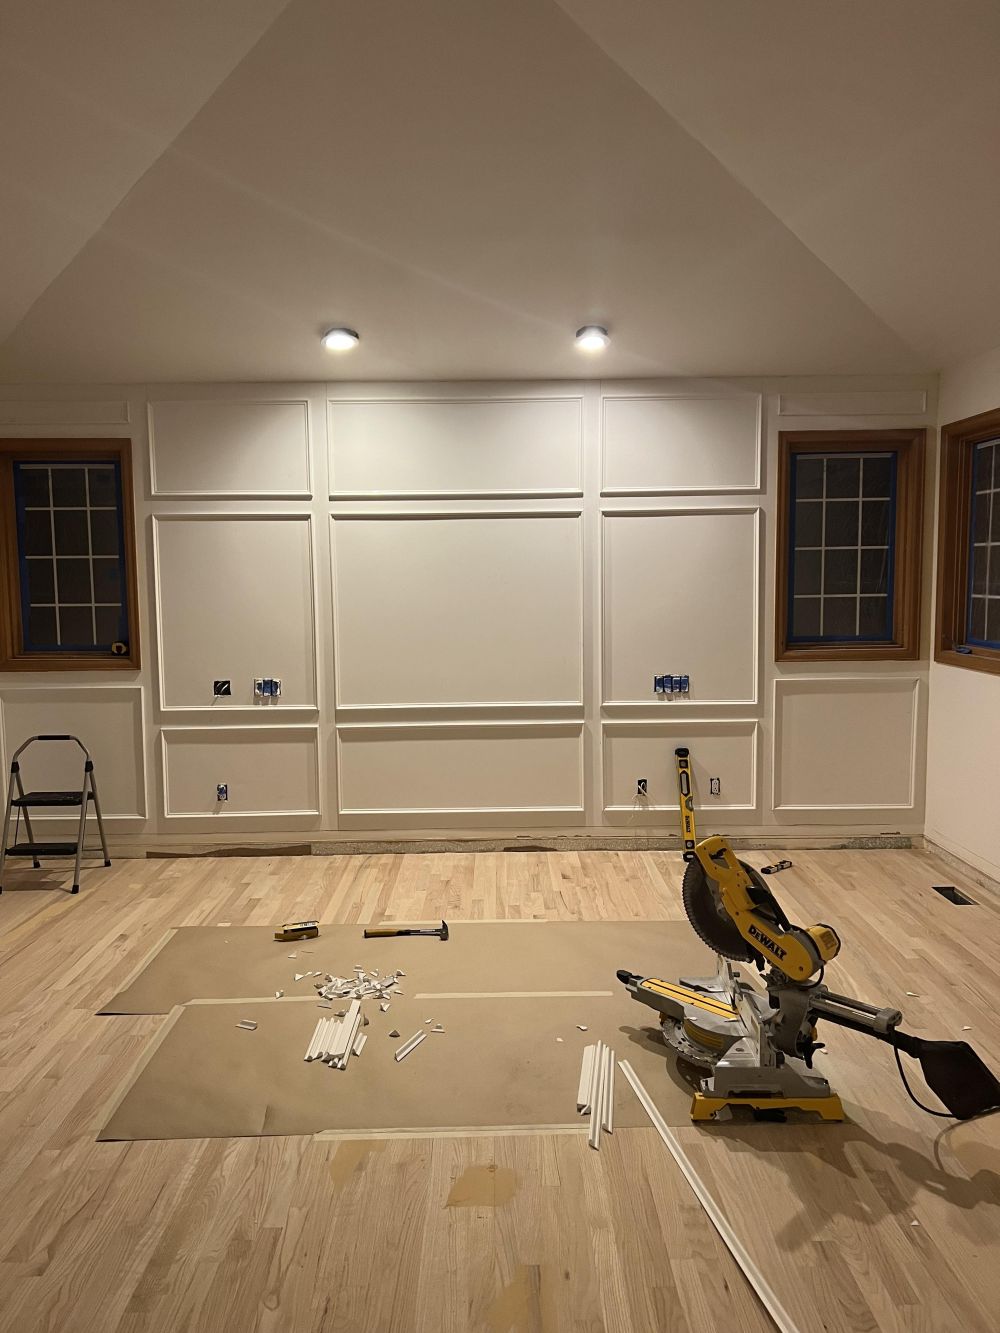
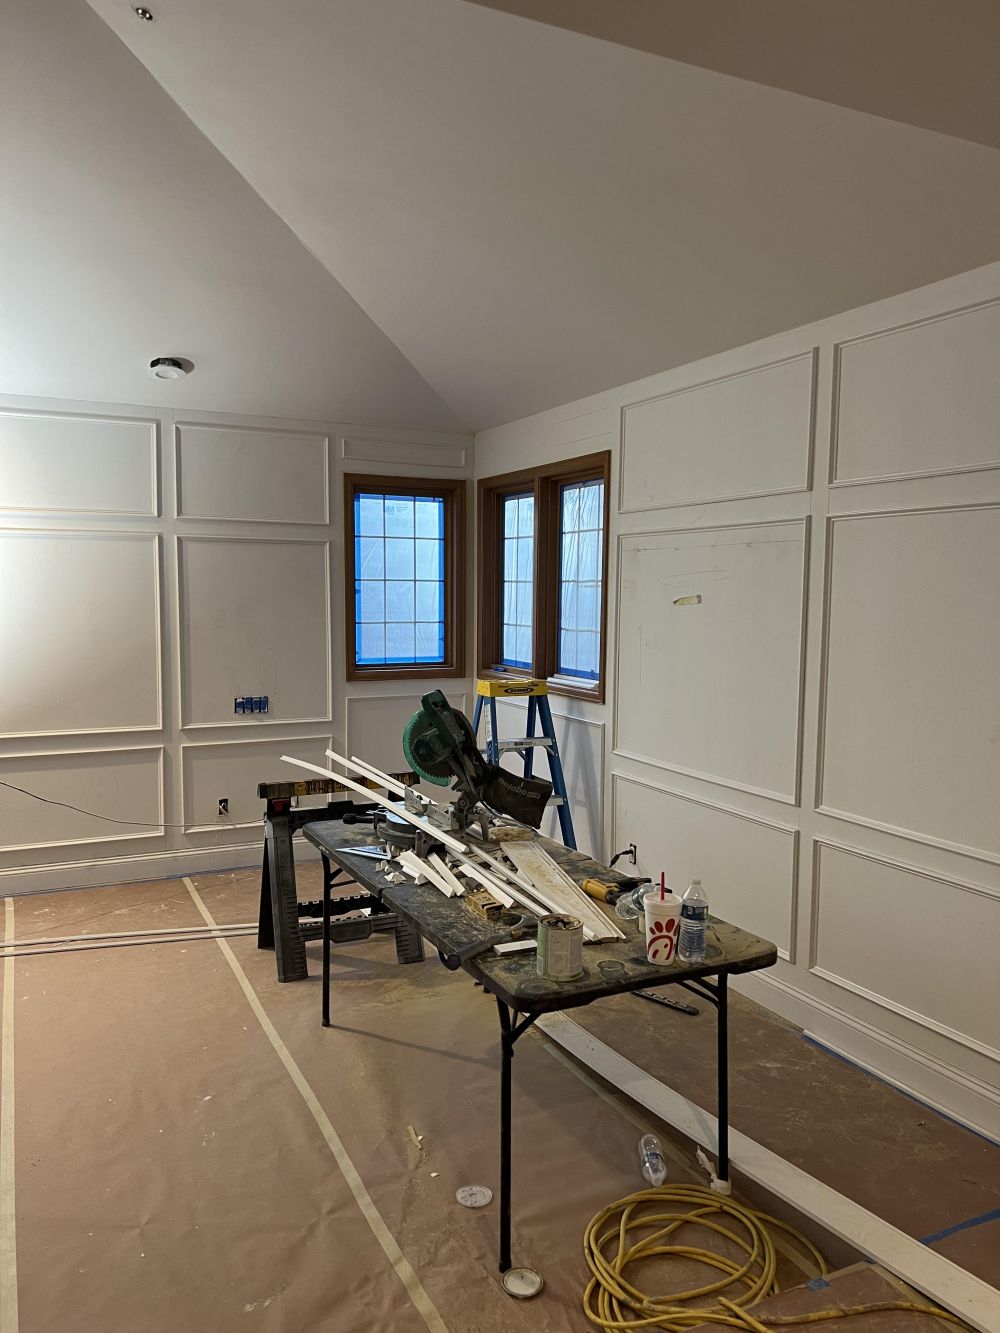
Once the layout was set, her husband began installing the trim. He used angled cuts to form rectangular frames. Progress photos display a miter saw, cut molding pieces, and the first completed panels across the main wall.
In a Reddit post on r/DIY, the homeowner noted her husband’s lack of prior experience with this installation type. She identified the material as base cap molding, which creates a picture frame effect rather than serving as actual framing for artwork.
The work extended to adjoining walls, where matching rectangular panels were installed around the windows. Extending the molding beyond the bed wall created a consistent design, avoiding the treatment of one surface as a separate accent wall.
Accurate Cuts and Filled Joints Made the Difference
The homeowner provided specific advice in the Reddit discussion, emphasizing the importance of measurements and clean 45-degree cuts.
She advised cutting a new piece if a miter joint left a large gap, rather than hiding the issue with caulk. Preparing the molding for paint involved wood filler, sanding, and caulking, as visible seams could ruin the finished result.
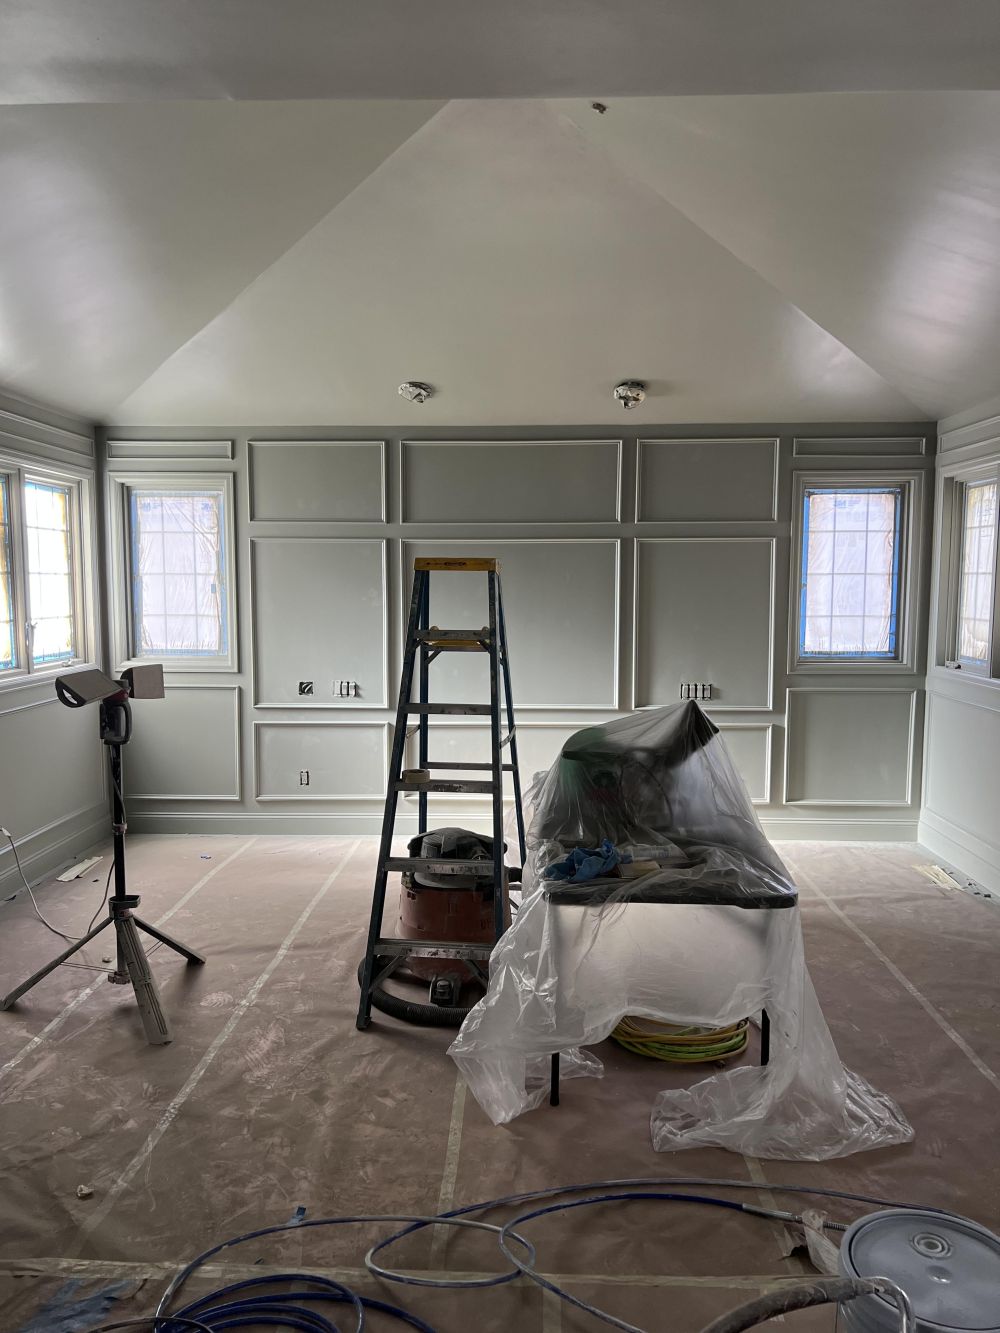
Photos show the installed panels before the room was furnished. Protective paper covered the floor, and plastic shielded the equipment. The trim follows the original rectangular plan, including narrow sections around the windows.
Farrow & Ball Pigeon Changed the Look of the Paneled Walls
The homeowner identified the finished paint color as Farrow & Ball Pigeon. This muted gray-green covers the paneled walls, giving the new molding a unified finish.
By matching the trim color to the walls, the raised edges show through changes in light and shadow, avoiding a contrasting white. The large center panels serve as a backdrop for the black four-poster bed, while smaller frames extend toward the windows.
A crystal chandelier hangs beneath the vaulted ceiling. Dark bedside tables, matching lamps, full-length curtains, and two curved chairs complete the bedroom. These furnishings introduce a traditional European influence without altering the original ceiling shape or window positions.
From Black Outlines on a Wall to a Finished Bedroom
The before-and-after comparison demonstrates how closely the completed molding follows the homeowner’s original plan. Large rectangular panels sit behind the bed, while smaller sections occupy the spaces around the windows and along the lower wall.
One concern raised in the Reddit discussion involved cleaning the raised trim, which can collect dust along its edges. The homeowner responded that after about a year, she had experienced no problems keeping it clean.
For a husband attempting picture frame molding for the first time, the project produced a bedroom with the appearance of traditional architectural paneling, without rebuilding the walls.
Would you attempt picture frame molding as a first DIY project, or hire a carpenter to get the measurements and corner joints right?
Image credits got @halcyonhaus_
The post He Had Never Installed Wall Molding Before, but His First Attempt Made Their Bedroom Look Like a European Chateau appeared first on Homedit.























This layout strategy is fascinating. How did you decide on the specific proportions for those vertical boxes? I’m eager to know how you balanced the visual weight against the vaulted ceiling without making the room feel cramped.
Thank you! I used a 3:2 ratio for the panels to create rhythm without overwhelming the space. The vertical lines actually draw the eye upward, enhancing the vaulted ceiling’s height rather than competing with it. Keeping the top panel slightly narrower helped maintain that airy, balanced look.