
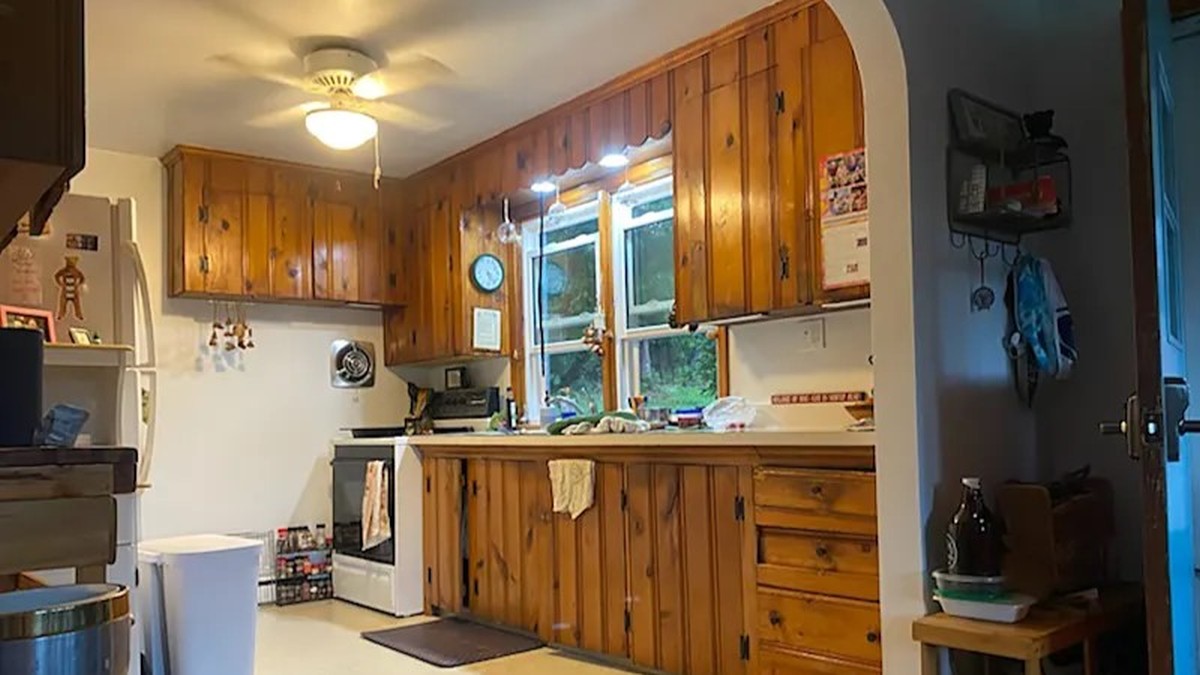
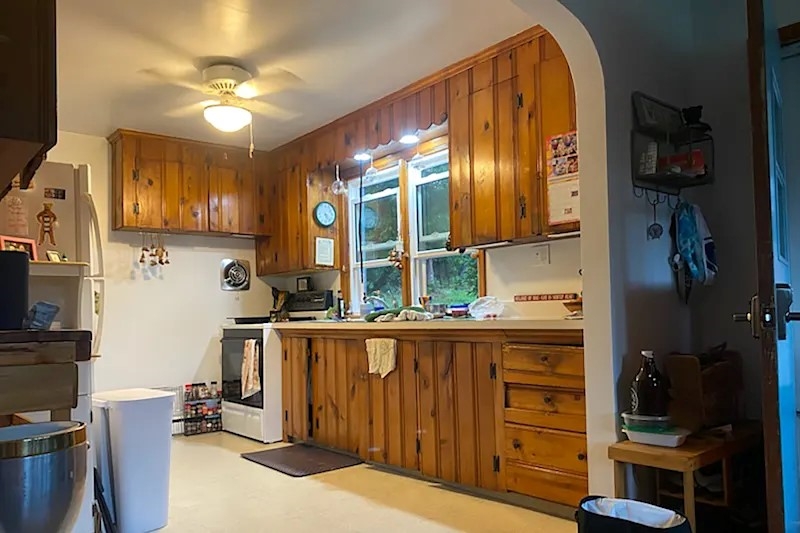
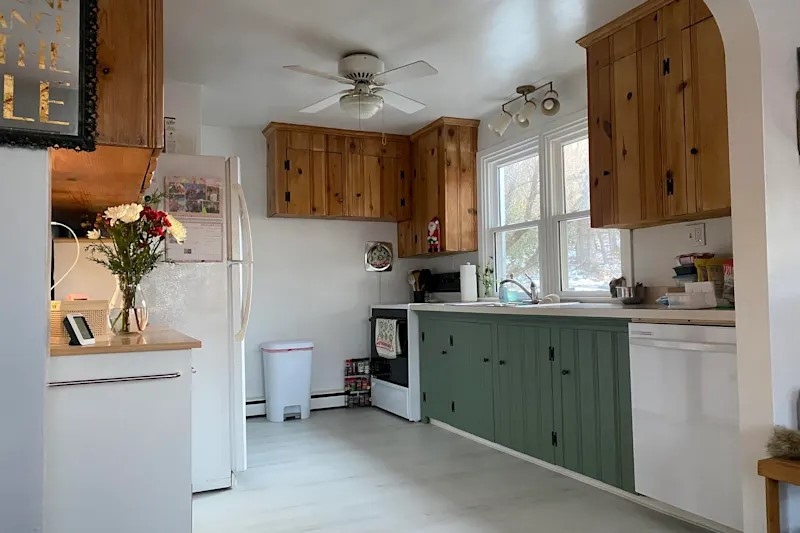
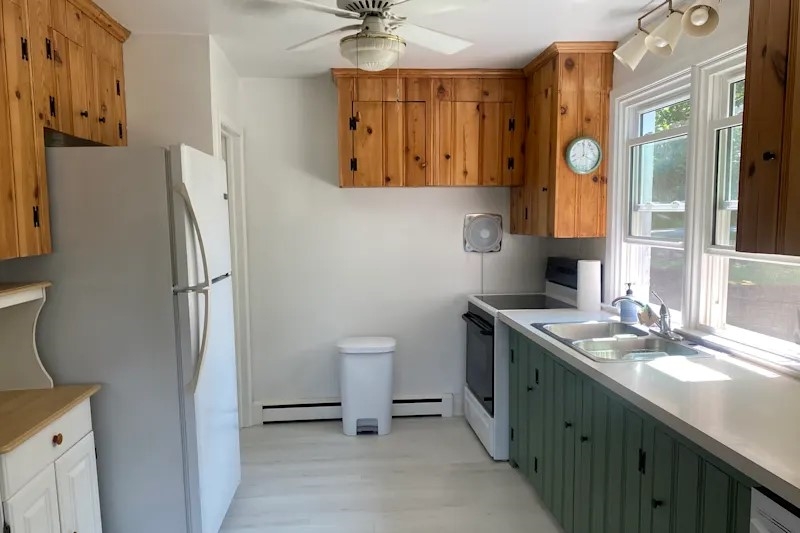
Imagine a compact kitchen where every cabinet, both upper and lower, is clad in the same orange-yellow knotty pine. The drawers are difficult to slide, the stain shines under the lighting, and the space feels more confined than its actual size suggests. Removing everything entirely begins to seem like the sole solution.
The cabinets themselves were not the issue; the finish was. Brittany’s kitchen occupies a 116-square-foot space in the family home constructed by her grandfather in 1956, and he personally built the cabinets alongside local carpenters. "I couldn’t take the knotty pine overload anymore!" she says. However, she was not prepared to exchange these handcrafted cabinets for what she describes as "poorly made new composite cabinets." Therefore, she retained the cabinets and altered their finish.
Why the abundance of pine felt excessive
"The cabinets dominated the room with traditional orange-y yellow stain," Brittany explains. When both upper and lower cabinets share a single warm hue, the entire room appears as one continuous wooden wall, allowing the orange tone to dominate. Since the color originated from the varnish rather than the pine itself, sanding away the varnish revealed the original wood.
Dividing the colors between the upper and lower sections is a dependable method for breaking up a wall of orange wood, and this technique is also effective on oak: white upper cabinets paired with blue lower cabinets can give a dated kitchen a custom-built appearance without the need for new doors.
The makeover, step by step
Sand away the orange layer. Brittany sanded the cabinets to eliminate the orange-tinted varnish, assisted by her brother, Joe, and her boyfriend, Kyle. "The intricate groove pattern on the cabinet faces took much longer to sand than I had anticipated," she notes. Allow additional time for any doors featuring grooves.
Test the finish on scrap wood first. Her intention was to apply an antique white stain to the upper cabinets. When tested on a spare piece of wood, it produced "more of a driftwood look than just a light cottage feel," so she dropped it.
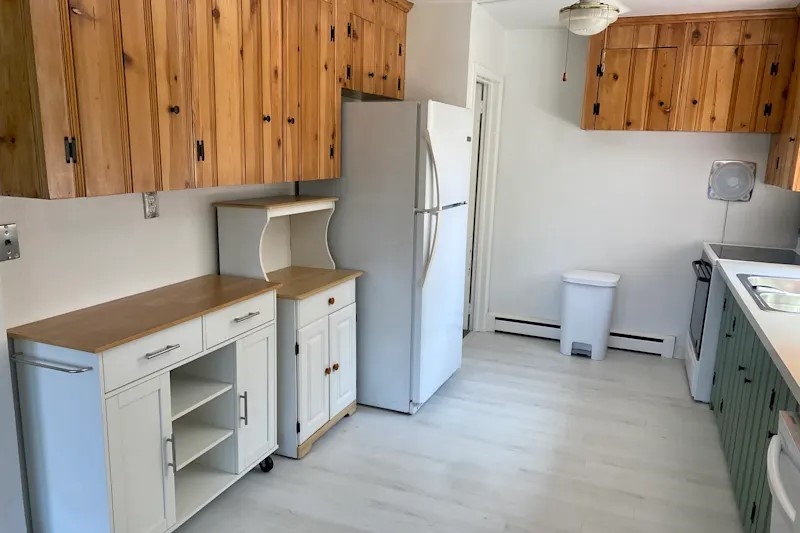
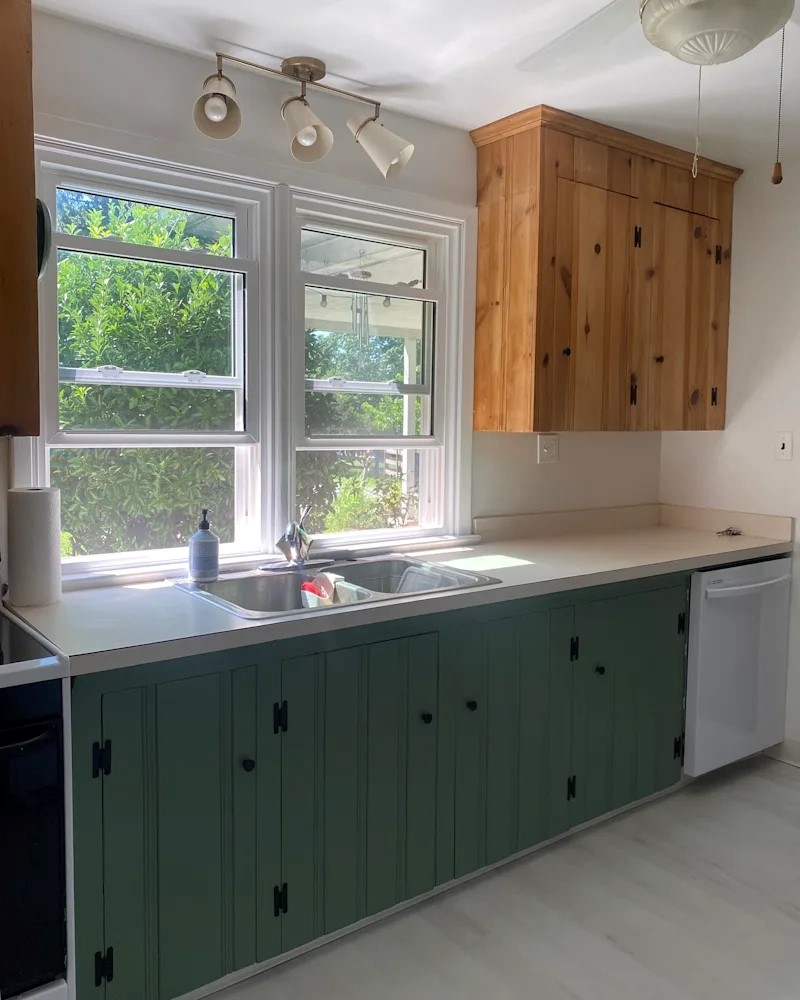
Keep the uppers natural. "Ultimately, we ended up putting only a clear polyurethane coat on the upper cabinets to eliminate the orange," she says.
Paint the lower cabinets. They chose Sherwin-Williams Privilege Green, SW 6193, positioning the color at the bottom while keeping the natural wood visible at eye level.
Reuse the hardware. "Instead of purchasing new hardware, I removed it, let it soak in a degreaser, and then spray-painted it black," she states. More than 10 months later, she reports that the finish has remained durable.
Painting was not the only modification. The $2,460 project also replaced the drawer section, which had broken rails, with a dishwasher, and added a $144 storage cart to compensate for the lost drawer space. She removed the scalloped panels above the sink, installed a new light fixture, and hired a professional to install new flooring. "The overall lighter, brighter feel of the room makes me so happy," she says.
Plan B, if the grooved doors are too difficult to sand all at once: begin with the lower cabinets, since paint provides better coverage than a clear coat, and decide on the treatment for the upper cabinets once you can see how the green looks in the room.
Where this makeover has its limits
Sanding is the primary task, and it takes longer than expected on doors with intricate details. A clear coat will only remove the orange appearance if the old varnish is completely removed, so do not rush this step.
Old houses require inspection before any sanding begins. The CDC notes that homes built before 1978 are likely to contain some lead-based paint, and sanding can generate hazardous lead dust. If any surface you plan to sand has old paint on it, test it first or hire a lead-safe certified professional.
Some aspects of this project may not be suitable for everyone. A dishwasher requires water, drain, and electrical connections, and Brittany left the flooring installation to a professional. Consult a licensed professional for any tasks you are uncertain about.
Sand off the orange layer, keep the wood on the upper cabinets, and let the green color dominate the lower half. That is the key.
The post She painted her grandpa’s knotty pine lowers Privilege Green and the kitchen felt brighter appeared first on Homedit.







So we painted the cabinets green to stop them from screaming “orange” at us. Brilliant. Because nothing says “modern sanctuary” like a 1950s wood grain texture wearing a bright green coat of paint. Truly, the pinnacle of interior design evolution.
Haha, you nailed it! That vibrant green definitely tames the orange tones while keeping that nostalgic 1950s charm. It’s a fun twist on traditional knotty pine that adds serious personality to the kitchen. Thanks for sharing your brilliant transformation!